Quick answer: Start with the exterior and structural elements before moving to interior finishes: secure permits and plan the project, check for lead and asbestos, tear out old materials, fix the framework, handle the roof and outside walls, install plumbing, HVAC and electrical rough-ins, clear the rough and framing inspections, add insulation, put up drywall and wet-area backer board, fit cabinets and tile, place countertops and fixtures, install wood flooring, and conclude with paint, trim and the final inspection. The logic behind this sequence is straightforward: avoid completing a surface that future workers need to access or that water might still touch.
Reworking tasks and schedule slips often happen when a step is attempted too soon: placing tile before a leak is discovered, installing drywall before the electrician finishes, or laying hardwood while painters are still applying primer. The sequence below aligns with the inspection order in the International Residential Code, the EPA’s guidance on lead, asbestos and moisture, the Department of Energy’s advice on insulation and air sealing, and the National Wood Flooring Association’s job-site conditions. Details on budget, timeline and contractor selection appear in how to plan a whole-home renovation; this guide concentrates on the workflow itself. All figures are drawn from a code, a government agency or an industry source listed in the Sources, verified in September 2026.
Renovation Order at a Glance
| Phase | Main work | Why it comes at this point |
|---|---|---|
| 1. Plan and permit |
Design, material selection, permit application | Permits are required before altering, repairing or demolishing a building or changing its electrical, gas, mechanical or plumbing systems |
| 2. Test for hazards |
Lead paint and asbestos testing in older homes | Demolition disturbs painted surfaces and building materials, so testing has to come before it |
| 3. Demolition |
Removing finishes, fixtures and non-structural walls | Opens walls and floors so hidden damage, such as mold around leaking pipes, can be found |
| 4. Structure and exterior |
Framing repairs, roof, windows, doors, siding | Moisture control is the key to mold control, so the house has to keep water out before interior work starts |
| 5. Rough-ins |
Plumbing, HVAC, gas and electrical lines inside open walls | Rough inspection happens before walls are covered and before fixtures are set |
| 6. Framing and insulation |
Framing inspection, insulation, air sealing | Framing is inspected after rough inspections are approved, and insulating is easiest while walls are open |
| 7. Drywall and backer |
Drywall, tile backer board, shower waterproofing | Closes the walls only after inspections, with listed backer materials in tub and shower areas |
| 8. Cabinets and tile |
Cabinet installation, wall and floor tile, primer coats | Cabinet tops must be flat and true before countertops, and primer is a wet trade that should finish before wood floors arrive |
| 9. Counters and fixtures |
Countertops, sinks, faucets, lights, appliances | Countertops sit on finished cabinets, and fixtures go in after the rough inspection |
| 10. Wood flooring |
Hardwood or engineered wood installation | Wood flooring waits until the house is enclosed and wet trades are complete |
| 11. Paint and final |
Final paint coats, trim, hardware, cleanup, final inspection | Final inspection takes place after the permitted work is complete and before occupancy |
What Happens in Each Phase of a House Renovation?
Each phase depends on the one before it. Rushing ahead typically results in double costs: one payment for building and another for removing it.
1. Plan the whole project and pull permits
Determine the complete scope prior to starting demolition: identify which walls will shift, the location of plumbing fixtures, the electrical load requirements, and desired finishes. Selecting cabinets, tile, and fixtures at an early stage ensures accurate rough-in work, as plumbers and electricians position lines to fit specific products. The International Residential Code mandates a permit prior to any construction, alteration, repair, or demolition of a building, or the installation, alteration, or replacement of a regulated electrical, gas, mechanical or plumbing system.
2. Test for lead and asbestos before anything is torn out
In 1978, the federal government prohibited the sale of lead-based paint for residential use. The EPA states that approximately three-quarters of U.S. homes built before 1978 still contain some lead-based paint. Around Tampa Bay, that covers the 1920s bungalows of Seminole Heights and the mid-century ranches of South Tampa. It also covers many of the 1960s and 1970s homes in Carrollwood. Individuals compensated for disturbing painted surfaces in a pre-1978 home require certification and training in lead-safe work practices under the EPA’s Renovation, Repair and Painting (RRP) Rule. Asbestos is more difficult to detect: the EPA notes that visual inspection usually fails to reveal asbestos content in a material, and recommends an inspection by a trained, accredited professional when remodeling is planned.
3. Demolish and inspect what is behind the walls
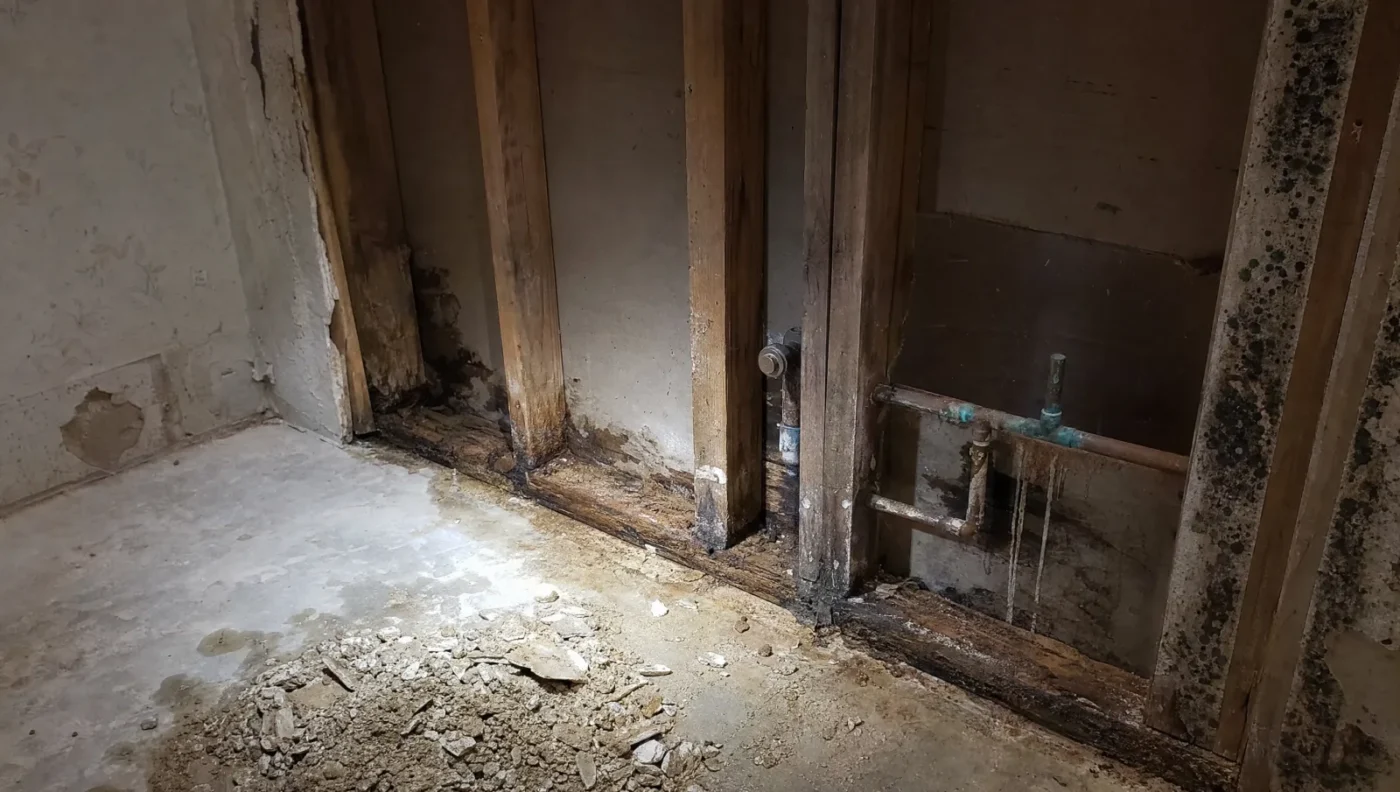
The true scope of the project becomes apparent during demolition. The EPA identifies the interior of walls surrounding pipes with leaks or condensation, and roofing materials located above ceilings, as areas where mold can hide. Allocate time after demolition to evaluate the frame, subfloor, wiring, and piping before purchasing materials that depend on them.
4. Fix the structure, roof and exterior envelope
Stopping water is the primary objective. The EPA’s guidance is clear: moisture control is the key to mold control, and cleaning up mold without resolving the water issue will most likely result in the mold returning. Consequently, work on the structure, roofing, windows, exterior doors, and siding constitutes the initial construction phase. Exterior work also provides an opportunity to enhance energy performance: the Department of Energy notes that specific air sealing measures might be feasible solely during extensive renovations like re-siding.
5. Run the plumbing, HVAC, gas and electrical rough-ins
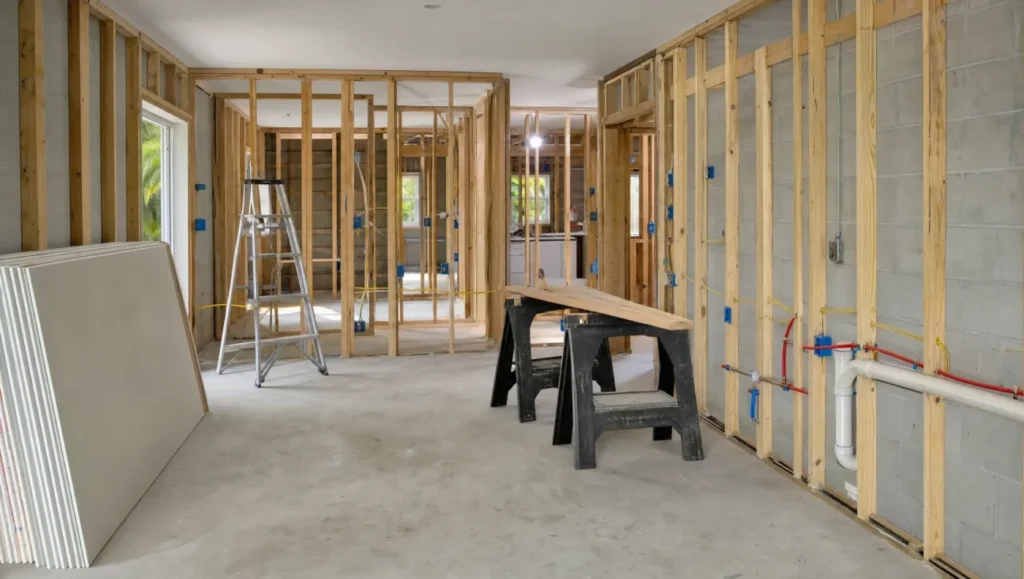
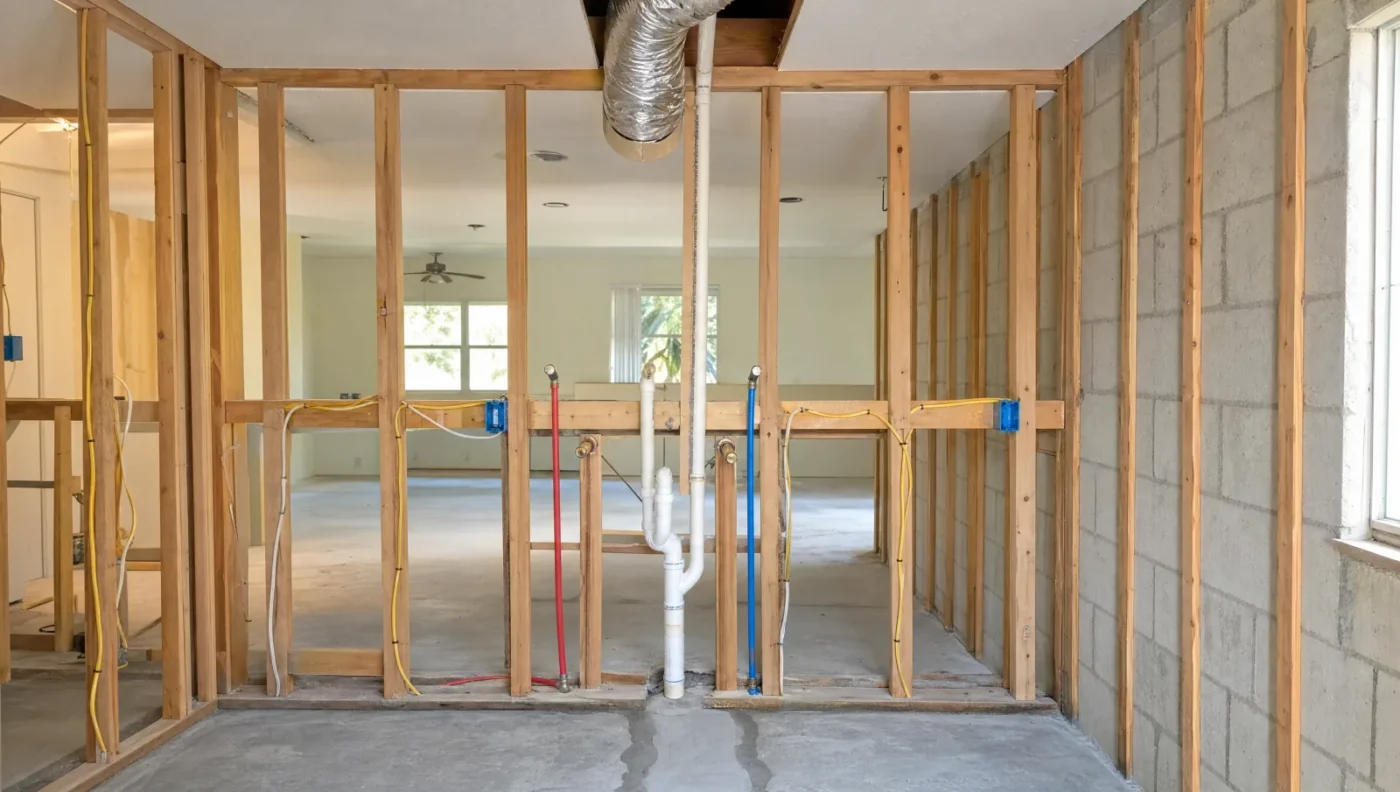
With the wall structures open, trades install the various supply and drain pipes, ducts, gas pipes and electrical wiring. This is the moment to swap out aging pipes, boost an undersized electrical service and create new circuits for added appliances, tasks that align with the work outlined in upgrading what is behind the walls. The IRC mandates a rough inspection of the plumbing, mechanical, gas and electrical systems before these elements are covered, before fixtures or appliances are put in, and before the framing inspection.
6. Pass the framing inspection, then insulate and air seal
The IRC schedules the framing inspection for after the roof, framing, firestopping and bracing are installed and after the rough inspections have been approved. Insulation and air sealing follow, taking advantage of the fact that every cavity remains accessible. The Department of Energy states it clearly for exterior tasks: re-siding provides access to bare walls, making insulation and air sealing tasks easier and less expensive at that point. This same reasoning holds for open interior walls, attics and floors.
7. Hang drywall and install wet-area backer board
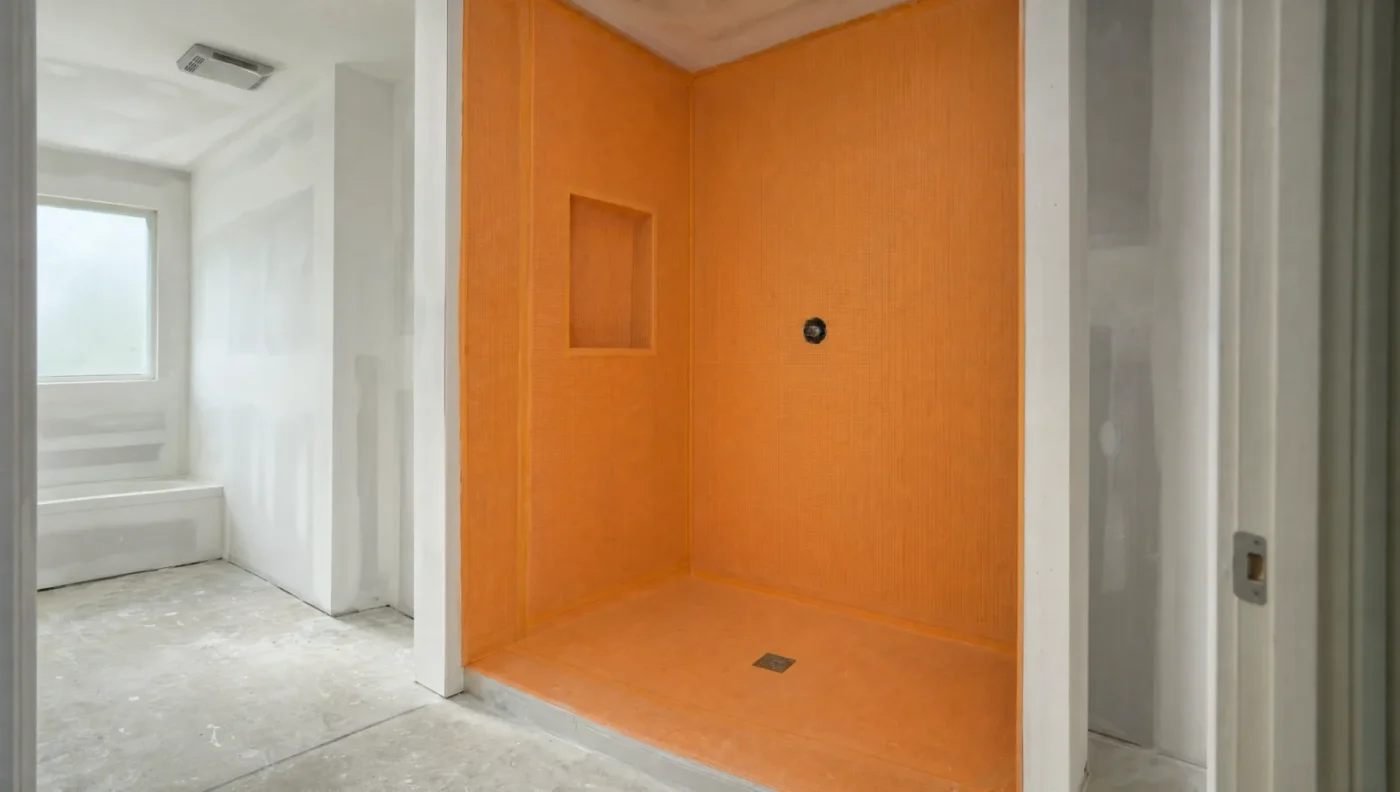
The IRC forbids covering or concealing work until the building official gives approval, so walls remain open until the inspector checks the interior. For tub and shower zones, the IRC mandates tile backers selected from a listed set of materials and put in place per the manufacturer’s recommendations, while banning water-resistant gypsum board in spots facing direct water exposure. At this point, shower waterproofing membranes are applied prior to laying any tile.
8. Install cabinets and tile, and prime the walls
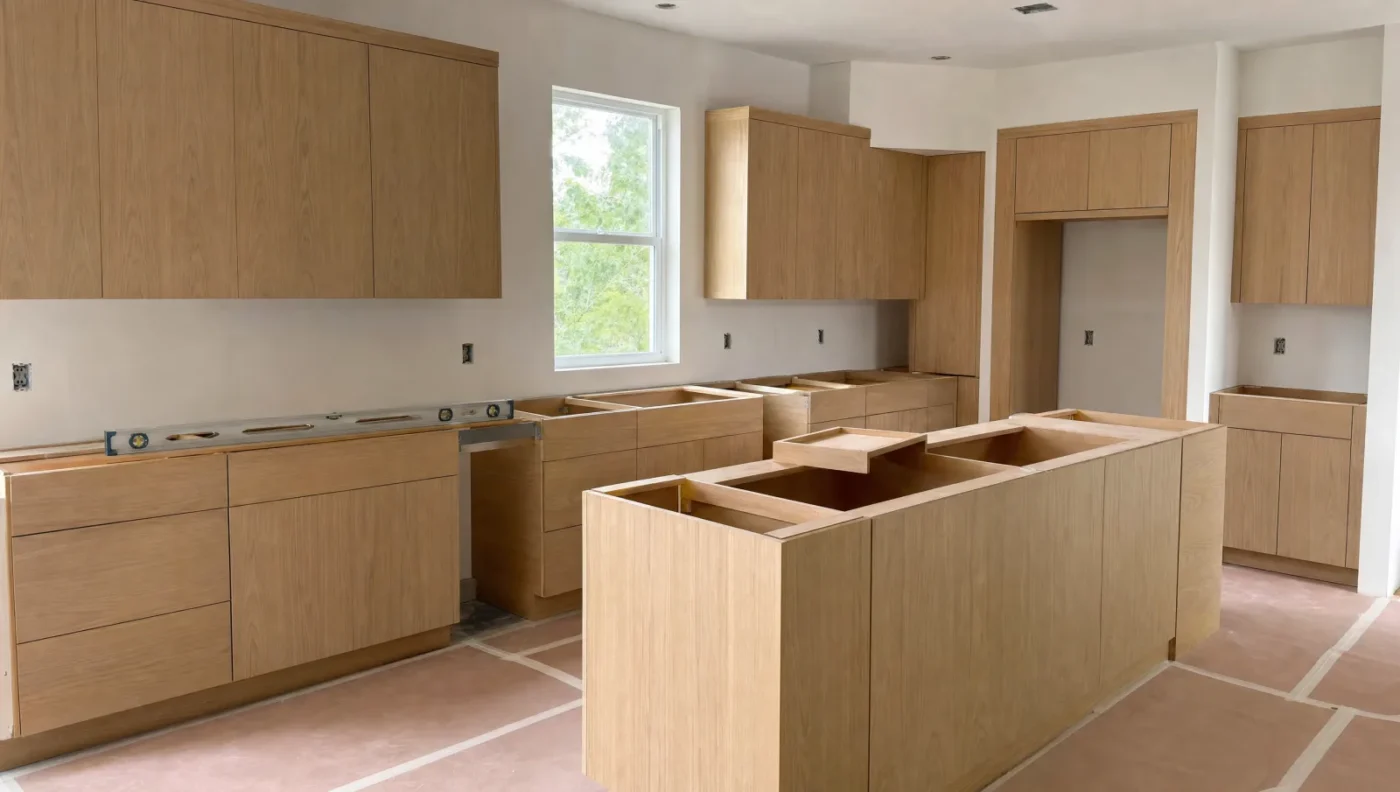
Once the walls have been finished and primed, new cabinets are installed so they sit level against the flat surfaces. This stage typically includes laying wall tile, shower tile, and floor tile in kitchens and bathrooms. Primer coats are also applied during this period, as the NWFA classifies priming as a wet trade that should be finished before wood flooring arrives.
9. Set countertops, fixtures and appliances
Cabinets must be secured first so that countertop measurements and fitting can proceed. The MSI quartz installation guide mandates that cabinet surfaces are flat and true to within 1/16″ in 18″ prior to fitting. Subsequent steps involve placing sinks, faucets, light fixtures and appliances, which link to the lines that cleared rough inspection.
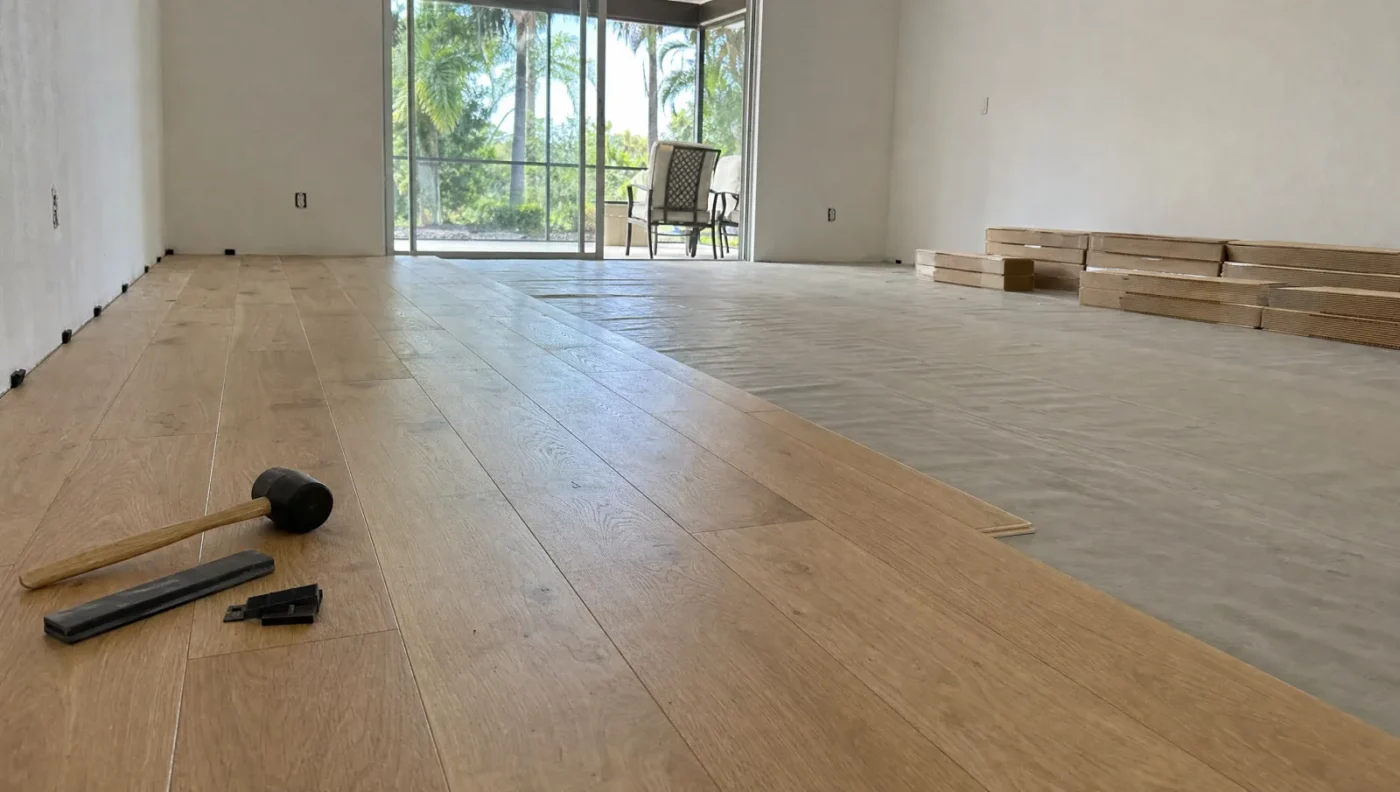
10. Install wood flooring
Wood flooring is scheduled for the later stages of construction. According to the NWFA Installation Guidelines, delivery of wood flooring should wait until the structure is completely enclosed, all windows and doors are fitted, and wet trades including concrete, plaster, drywall, texturing and primer coats have finished. Additionally, the interior environment needs to maintain standard residential temperature and humidity levels for at least five days prior to laying the floor.
11. Finish paint, trim, hardware and the final inspection
The project concludes with applying final paint coats, installing baseboards, door casing, cabinet hardware and touch-ups, followed by site cleanup. The IRC specifies that the final inspection occurs once all permitted work is finished but before anyone moves into the home.
What Do Codes and Guidelines Say About Renovation Order?
No single rule book dictates the sequence of a renovation, yet various authorities pin down specific segments of the process.
International Residential Code: inspections set the sequence
The 2021 IRC mandates a rough inspection for plumbing, mechanical, gas, and electrical systems prior to them being covered up. Following the approval of those rough inspections, a framing inspection is required, and a final inspection must occur before the space is occupied. The code further states that work shall not proceed past the stage designated in each successive inspection without the building official’s approval. However, the IRC is a model code, so the edition your state or local government adopts, along with any local amendments, determines which inspections your project needs. In Florida, that is the statewide Florida Building Code, Residential, which is based on the IRC and enforced by your county or city building department. Historic districts can add a step: in St. Petersburg, homes in the Old Northeast and Kenwood historic districts go through a separate preservation review on top of the permit.
EPA lead and asbestos guidance: test before demolition
The EPA’s RRP Rule covers anyone paid to disturb painted surfaces in homes built before 1978. However, the EPA notes that this regulation typically excludes homeowners performing work on their own pre-1978 homes. For asbestos, the agency suggests that individuals avoid collecting samples on their own and instead hire a trained, accredited professional.
EPA moisture guidance: stop water before finishing
According to the EPA, drying water-damaged areas and items within 24 to 48 hours is important to stop mold from developing, while plumbing leaks and other water issues require immediate repair. This document serves as homeowner guidance on mold rather than a construction schedule, yet it clarifies the reason for prioritizing roof, exterior and plumbing repairs over interior finishes.
Department of Energy: insulate while access is open
Per the Department of Energy’s insulation and air-sealing guidance, certain sealing tasks in a current residence might be feasible solely during a significant remodel, for example re-siding. The document lacks a mandated sequence, yet it explains the rationale for placing insulation after the rough-ins and prior to wall closure.
NWFA Installation Guidelines: flooring waits for wet trades
Hardwood Floors magazine outlines the NWFA’s conditions, which mandate an enclosed building, installed windows and doors, completed wet trades and at least five days at normal living conditions prior to the installation of wood flooring. These standards are specific to wood flooring; tile and other floor types must adhere to their own manufacturer instructions.
Should You Renovate Room by Room or All at Once?
It depends on budget (see what a whole-home renovation costs in Tampa Bay) and whether you are living in the house. Renovating the whole house in a single phase allows each trade to move through the sequence in one go, meaning walls are opened and repaired just once. A phased renovation spanning months or years is viable provided each stage adheres to the same order throughout the house:

- Stop water first. Roof leaks, defective windows, or pipe failures must be addressed prior to interior work, as the EPA notes that mold will most likely return if the water problem is not fixed.
- Upgrade shared systems next. Since electrical service, main plumbing lines, and HVAC supply all spaces, improving these early prevents the need to disturb completed areas down the line.
- Do wet rooms before dry rooms. Kitchens and bathrooms require plumbing, waterproofing, and inspections. Completing these zones before bedrooms and living areas reduces dust and rework in spaces already finished.
- Save flooring that runs through the house for later. Laying continuous wood flooring is simpler after the wet trades have finished their work in the relevant areas.
When Should You Stop and Call a Professional?
- Suspected asbestos. Do not touch the substance; instead, engage an accredited professional to collect samples, as the EPA notes that improper sampling can pose a greater risk than leaving the material undisturbed.
- Paint in a home built before 1978. Hire a certified renovation firm for compensated tasks that disturb painted surfaces.
- Water damage or mold behind walls. Locate and repair the water source prior to rebuilding. After a hurricane or flood, that work starts with storm damage restoration.
- Moving or removing walls. A permit is required for building alterations, and the IRC’s exemption for ordinary repairs does not apply to the removal of a structural beam or load-bearing support.
Where CMK Construction Fits
CMK Construction manages kitchen and bathroom renovations across Tampa Bay and Sarasota by following the plan-first order detailed earlier. The team measures the space and confirms each structural detail before ordering materials, while clients pick out all cabinets, countertops, tiles, vanities, and fixtures in person at the 4,000 sq ft Design Studio prior to construction. As a state-certified general contractor, CMK obtains required permits, assigns a dedicated project manager, applies Schluter waterproofing systems from the substrate up in every bathroom, and supports its work with a one-year Peace of Mind Warranty; the approach to wet areas is described in how Schluter waterproofing protects a bathroom. For homes needing roof work first, CMK also provides roof replacement, with the same licensed crew performing tear-off and installation. Kitchen project details are found on the kitchen remodeling page.
Schedule a free consultation or call (813) 379-2116.
Related reading:
- Whole-Home Renovation Cost per Square Foot in Florida
- How Long Does a Kitchen Remodel Take in Tampa?
- How Does Remodeling Affect Home Value and Insurance in Florida?
Renovation order FAQ
Should you paint or install floors first when renovating?
Paint first, at least the primer coats. According to the NWFA, primer coats and other wet trades should be finished prior to wood flooring arriving at the job site.
Should you replace the roof before renovating the inside?
Yes, provided the roof is leaking or approaching the end of its life. The EPA identifies roof materials affected by roof leaks as a hiding spot for mold, noting that mold typically comes back when the water problem remains unresolved.
Should the kitchen or the bathroom be renovated first?
It depends on the condition of each room. In a whole-house project, both areas proceed through identical phases simultaneously; if you are tackling one at a time, begin with the room featuring a known leak or failing plumbing, as the EPA advises addressing plumbing leaks and other water problems promptly.
When should insulation be added during a renovation?
After the rough-ins pass inspection and before drywall. The IRC mandates a rough inspection before walls are enclosed, and the Department of Energy explains that access to bare walls simplifies and reduces the cost of insulating and air sealing.
Do you need a permit to renovate a house?
Usually, for anything beyond cosmetic work. The IRC mandates a permit for constructing, altering, repairing, or demolishing a building, or for installing, altering, or replacing a regulated electrical, gas, mechanical or plumbing system; the IRC and local codes identify exemptions for certain minor work.
Sources
- International Code Council, 2021 International Residential Code, Chapter 1: Scope and Administration
- U.S. Environmental Protection Agency, Lead Renovation, Repair and Painting Program
- U.S. Environmental Protection Agency, Protect Your Family from Exposures to Asbestos
- U.S. Environmental Protection Agency, A Brief Guide to Mold, Moisture and Your Home
- Hardwood Floors magazine, Who Should Determine When a Job Site Is Ready for Wood Flooring Installation?
- U.S. Department of Energy, Energy-Efficient Home Improvement Credit: Insulation and Air-Sealing Essentials
- International Code Council, 2021 International Residential Code, Chapter 7: Wall Covering
- MSI Surfaces, How to Install Quartz: Quartz Installation Instructions
- CMK Construction, Kitchen and Bath Remodeling (The CMK Process)
- CMK Construction, Roofing Services