Last updated September 2026
The most expensive bathroom remodeling mistakes happen before the first tile comes off the wall.
Not the tile color. Not the faucet finish. Those are easy to change. The costly ones are a layout that was never measured, a toilet moved across a concrete slab for no real benefit, a shower that looks perfect and leaks into the wall two years later, or a contract that says “new shower” and nothing else.
CMK Construction has remodeled bathrooms across Tampa Bay and Sarasota since 2004, more than 7,000 projects in all, and the same handful of problems shows up again and again. Here are the five we see most, what each one costs you, and what to do instead.
Quick answer: The five bathroom remodeling mistakes that cost Tampa Bay homeowners the most are starting demolition without a measured design, relocating plumbing on a slab without a clear payoff, picking finishes without planning for water and Florida humidity, comparing proposals that don’t cover the same scope, and signing a vague contract. Every one of them is avoidable with a written plan, an itemized proposal, and a contractor who can explain what’s behind the tile.
1. Starting Without a Complete Bathroom Design Plan
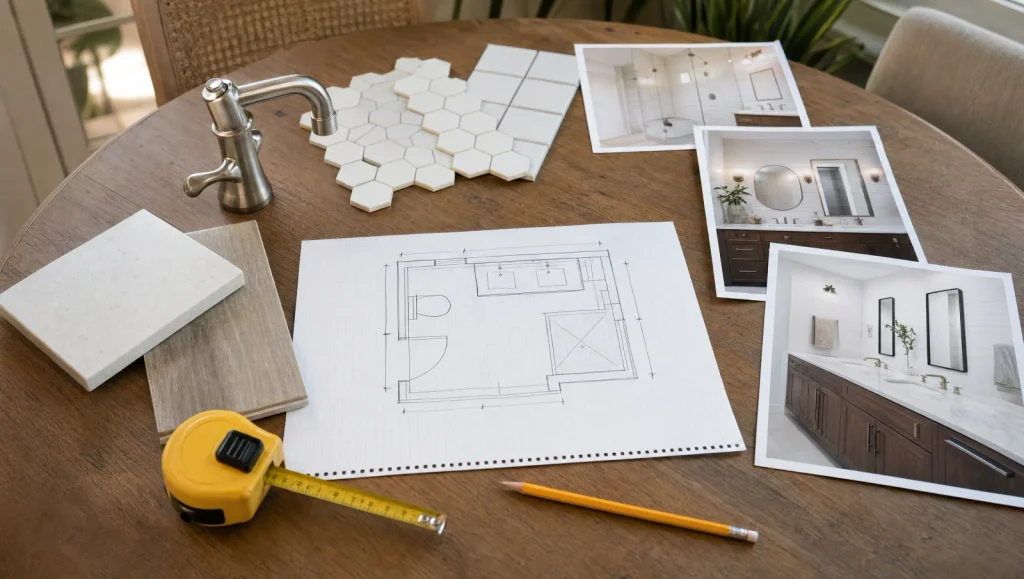
A folder of inspiration photos is a good starting point. It is not a plan. It won’t tell your contractor whether the vanity drawers clear the door swing or where the towels go so you can reach them from the shower.
Before you pick a single finish, write down what’s wrong with the bathroom you have. Shower too narrow? Nowhere to put anything? Two people trying to get ready at 6:45 a.m. and bumping into each other?
Those answers drive the design. A complete plan covers:
- Layout and clearances. Room to open doors, pull out drawers, and move between fixtures without turning sideways. Code sets the minimums (15 inches from the toilet centerline to a wall or vanity, 21 inches of clear floor in front of it), and the comfortable numbers are larger.
- Storage. Toiletries, towels, cleaning supplies, hair tools. If it doesn’t have a home, it lives on the counter.
- Lighting. General light, real task lighting at the mirror, and a wet-rated fixture over the shower.
- Daily routines. Who uses the room, when, and whether those times overlap.
- Future needs. A curbless entry, a shower bench, or solid wood blocking inside the walls so grab bars can go in later without opening the tile. Cheap to plan now, expensive to add later.
Bigger is not always better. A wider vanity can make a small bathroom feel like a hallway. A floating vanity opens up the floor but can cut your storage in half.
Lock in the major selections before you set a demolition date. The vanity, tile, and plumbing fixtures should be on site or confirmed before the old bathroom comes out. Frameless shower glass is the one item that can’t be ordered early: it’s templated to the finished tile, then fabricated and installed a week or two later, so the schedule has to leave room for it. A gutted bathroom waiting on a backordered vanity is a bathroom nobody can use.
At CMK the plan comes first. We measure the room, map fixture clearances on a drawing, check whether the existing drains can stay put, and flag long-lead items before demo is scheduled.
2. Moving Plumbing Without Weighing the Benefit
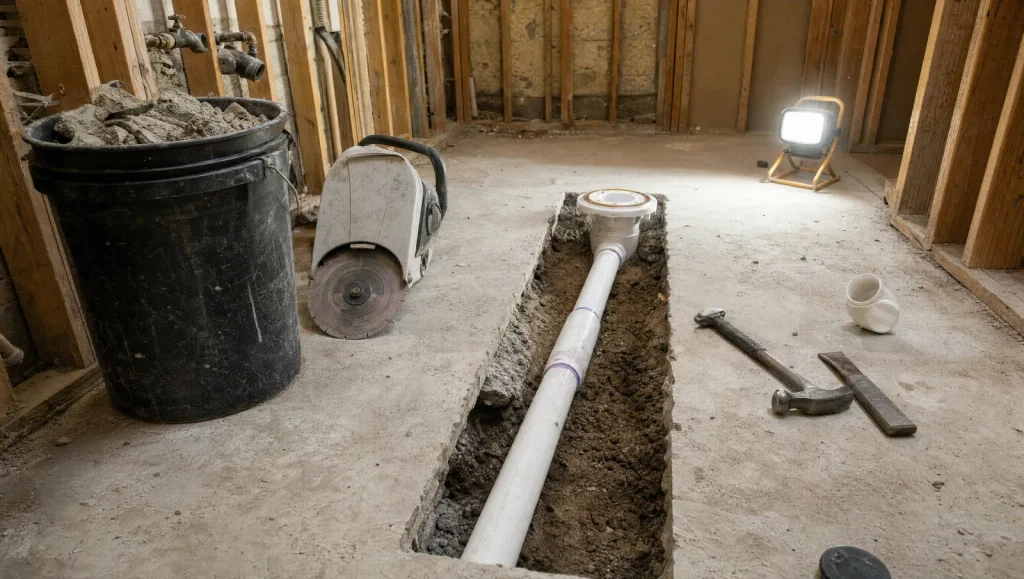
Most homes in Tampa Bay and Sarasota sit on a concrete slab. That matters more in a bathroom than anywhere else in the house.
Sliding a vanity along the same wall is minor work. Moving a toilet, shower drain, or tub is not. The toilet drain is 3 or 4 inches in diameter and has to keep a slope to the main line, so relocating it on a slab means saw-cutting and removing concrete, rerouting the drain and vent, pouring new concrete, and repairing everything around it. It also triggers a plumbing permit and a rough-in inspection before the floor can be closed back up. You’ve spent real money before you’ve bought anything you can see.
That doesn’t mean every fixture has to stay put. If the current layout blocks the door, wastes half the floor, or makes the shower awkward to enter, changing it may be the best decision in the whole remodel. We relocate fixtures on slabs constantly. It just has to be a deliberate choice that buys you a better room, not a side effect of a layout you picked from a photo.
The mistake is paying for a relocation without knowing what you’re getting for it.
Ask for two versions of the plan: one that keeps the main plumbing where it is and one that changes the layout. Then compare them on what matters.
| What changes | Keep fixtures in place | Relocate a fixture on the slab |
|---|---|---|
| Slab work |
None. The existing drains are reused and inspected. | Concrete saw-cut, a new drain run at the correct slope, a new vent tie-in, and a concrete patch. |
| Permits and inspections |
Standard bathroom permit for the plumbing and electrical work in the scope. | Plumbing permit plus a rough-in inspection before the slab is closed, then the standard inspections. |
| Schedule | Demo to rough-in usually within the first week. | Adds days for cutting, plumbing, inspection, and concrete cure before tile can start. |
| Where the money goes |
The shower, tile, vanity, lighting, and storage. | A share of the budget goes into the floor before any finish is bought. |
| Worth it when |
The room already functions and the goal is a better shower, more storage, and better light. | The layout blocks the door, wastes floor space, or makes the shower hard to enter, and the new plan fixes that. |
If the existing layout already functions, that same money usually goes further on a better shower, more storage, and proper lighting. Because our plumbers are in-house, we can price both versions from the same drawing instead of waiting on a subcontractor’s estimate.
3. Choosing Finishes Without Planning for Water and Florida Humidity
A bathroom can look great in a photo and still be a headache to live with. Glossy floor tile gets slick when wet. A vessel sink eats the counter space around it. A doorless shower sends water places you expected to stay dry.
Judge every selection by where it goes and how you’ll use it.
Choose tile for the specific location
Shower floors, main floors, and walls have different requirements. For any floor that gets wet, look for tile with a wet DCOF rating of 0.42 or higher under the ANSI A326.3 standard, the industry test for slip resistance. The number is on the manufacturer’s spec sheet, and it’s the difference between a floor that’s safe barefoot and one that isn’t. Shower floors usually get small-format mosaic tile for the same reason: more grout lines mean more grip and an easier slope to the drain.
Want the look of wood? Wood-look porcelain gives you the style without the swelling and warping real wood does in a Florida bathroom. Our guide to bathroom materials for Florida humidity covers what holds up here and what fails.
Pay attention to what’s behind the tile
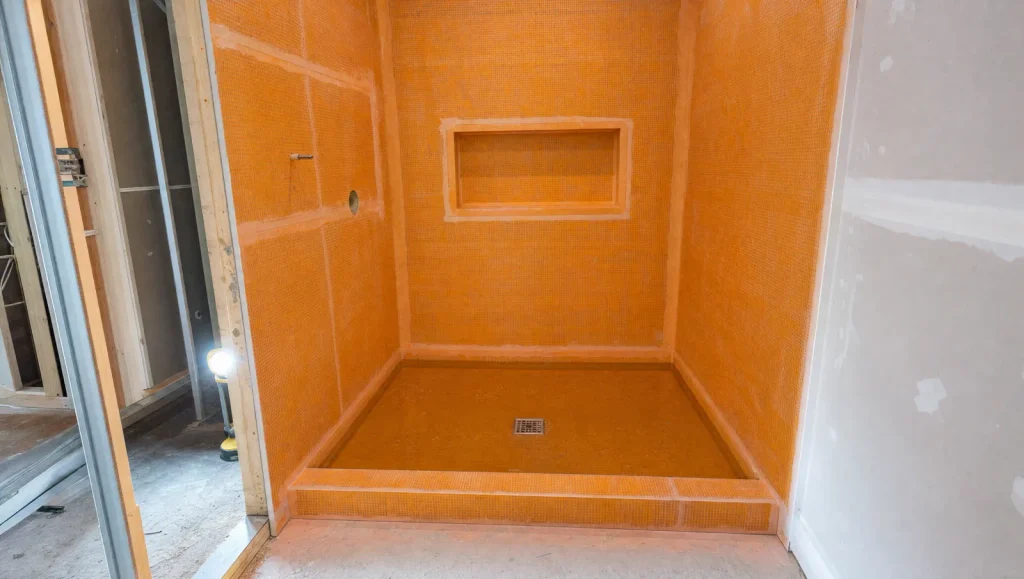
Tile and grout are not waterproof. They’re the finish. The waterproofing is the membrane and assembly behind and under them, especially at corners, seams, the niche, the bench, and the drain connection. Even Schluter, whose system we install in every shower, is clear that the tile covering itself is not a waterproofing system.
Ask your contractor three questions before tile goes on. Which waterproofing system is being installed, sheet membrane or liquid-applied? Is it a complete system, with matching corners, seam tape, and drain, or a mix of brands? And will the shower pan be flood tested, plugged and filled with water for 24 hours, before it’s covered? A vague answer to any of those is a red flag. A leak behind tile can hide for years and is one of the most expensive bathroom repairs there is.
Treat ventilation as part of the design
Tampa Bay humidity doesn’t need any help. An undersized exhaust fan, or one that dumps into the attic instead of outdoors, leads to peeling paint, mildew in the grout, and moisture problems above the ceiling.
The Florida Building Code requires a bathroom exhaust fan to discharge outdoors, not into an attic or soffit, and the Home Ventilating Institute’s sizing guideline is 1 CFM per square foot of floor area with a 50 CFM minimum. ENERGY STAR recommends outdoor-vented fans specifically to remove humid air at the source. Have your remodeling team size the fan to the room, confirm where the duct terminates, and put it on a timer or humidity-sensing switch so it runs long enough to clear the steam.
Waterproofing and ventilation won’t be the focal point of the finished room. They’re the reason it still looks finished in ten years.
4. Setting a Budget Without Defining What It Covers
A number without a scope behind it is not a budget.
Two proposals can be thousands apart and describe completely different projects. Before comparing prices, confirm each one covers demolition, debris hauling, plumbing and electrical, waterproofing, installation labor, finish materials, permits, and final cleanup. If one is missing any of those, it isn’t cheaper. It’s incomplete. For what a complete scope runs in this market, see our Tampa Bay bathroom remodel cost guide.
Look closely at allowances, the dollar amounts set aside for products you haven’t chosen yet. A low allowance is the easiest way to make a proposal look cheaper than it is. If the vanity you fall in love with is $1,200 over its allowance, that’s $1,200 added to the project. Ask whether each allowance covers the product only or the labor too, and ask what that dollar figure buys.
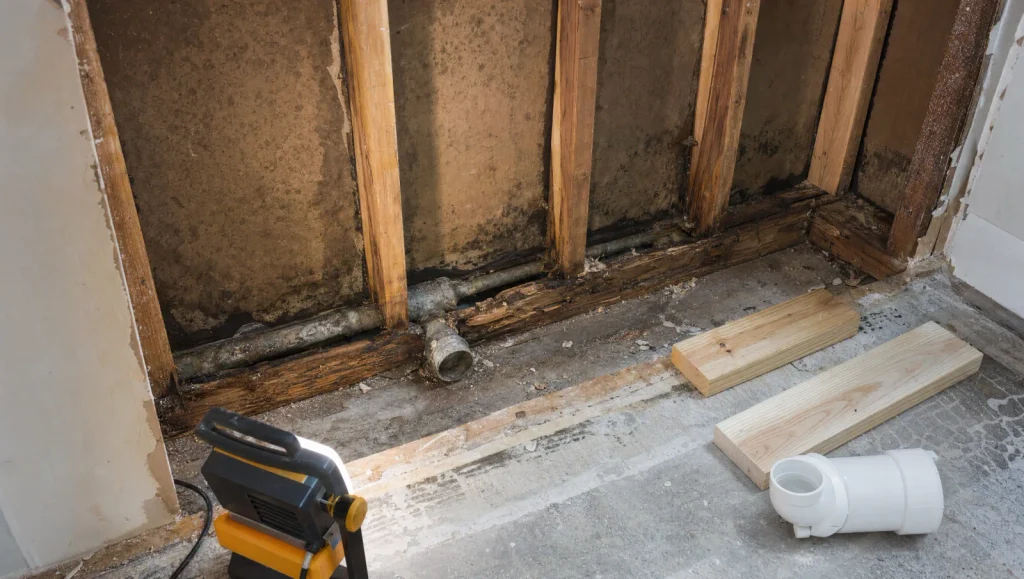
Plan a separate contingency for what’s hidden. When the old shower comes out, there may be rotted framing, a corroded drain line, or wiring that isn’t up to code. A 10 to 20 percent reserve is typical, with older homes and full gut remodels toward the higher end. A contingency is money you set aside, not money you’ve agreed to spend.
Keep surprises separate from upgrades. Replacing water-damaged subfloor and switching to a pricier shower system are both budget changes, but not the same kind, and your paperwork should show which is which. Agree ahead of time on how extra work gets priced, approved, and reflected in the schedule. If you’re using financing for part of the project, settle the terms before selections start so the allowance conversation only happens once.
5. Signing a Vague Contract or Starting Without One
A handshake and a total price tell you almost nothing about what you’re buying.
Before anyone swings a hammer, you should have a written agreement that spells out:
- The work included, and anything specifically excluded
- Selected products and materials, and any remaining allowances
- Payment amounts tied to specific milestones
- The expected timeline and how delays get communicated
- Who handles permits, inspections, protection of the rest of the house, and cleanup
- How changes to scope, price, or schedule get approved
- Warranty terms in writing, and who to call if something goes wrong
Then ask the practical questions. Who’s your day-to-day contact? How often do you get updates? If this is your only full bath, what’s the plan while it’s down?
Two Florida-specific checks belong here too. Look up the license number on the contract in the Florida Department of Business and Professional Regulation (DBPR) license search, and confirm it’s a state-certified general contractor or a licensed specialty contractor for the scope. Then make sure the contract says who pulls the permit. It should be the contractor, under their license, never you as an owner-builder to save a fee.
And if a proposal says “new shower,” push on it. Does that include the waterproofing system, tile, pan, fixtures, glass, and the niche or bench in the drawing? Getting that in writing now beats arguing about it after the walls are open.
The Five Mistakes at a Glance
| Mistake | What it costs you | Do this instead |
|---|---|---|
| No design plan |
Fixtures that don’t fit, a gutted room waiting on materials, change orders mid-build. | A measured drawing, clearances checked, every major selection confirmed before demo. |
| Moving plumbing blindly |
Slab cutting, extra inspections, and days added to the schedule for a room that works the same. | Price a keep-it plan and a move-it plan side by side, and move only when the room gets better. |
| Finishes by looks alone |
Slick floors, leaks behind the tile, mildew from a fan that vents into the attic. | Wet-rated tile (DCOF 0.42 or higher), a complete waterproofing system that’s flood tested, a fan sized to the room and ducted outside. |
| Budget without a scope |
Bids that can’t be compared, allowance overages, surprises mixed in with upgrades. | An itemized scope, realistic allowances, and a 10 to 20 percent contingency held separately. |
| Vague contract |
Disputes over what “new shower” meant, unclear payment triggers, no warranty in writing. | Written scope, exclusions, milestones, a change-order process, warranty terms, and the license that pulls the permit. |
Get the Plan Right Before Demolition Starts
Before you choose tile or approve a quote, bring us your inspiration photos, rough room measurements, and your list of what’s not working. In a free in-home consultation we’ll measure the room, compare layout options side by side, check whether your drains can stay where they are, and put together a written scope you can actually compare against other bids. Once the project is signed, you select every tile, fixture, and finish with a designer in our Tampa or Sarasota Design Studio, so you see how it all works together before construction starts.
CMK Construction handles bathroom remodeling from design through final inspection for homeowners across Tampa Bay and Sarasota. That includes custom showers, vanities, and accessible bathroom options.
Schedule a free in-home consultation or call (813) 379-2116.
Related reading:
- 10 Common Mistakes to Avoid During Your Bathroom Remodeling Journey
- How to Prepare Your Tampa Home for a Kitchen or Bathroom Remodel
- Gutting a Bathroom: What to Expect in Your Renovation
Bathroom remodeling mistakes FAQ
How much does a bathroom remodel cost in Tampa Bay?
Scope drives the price more than anything else. A guest or hall bath refreshed within its existing footprint typically runs $15,000 to $25,000. A full-gut family or primary bath with a custom tiled shower and a quartz vanity top runs $25,000 to $45,000. A primary suite with layout changes, relocated plumbing, and a custom walk-in shower starts around $50,000 and can pass $100,000 for a full redesign. Those are CMK’s planning ranges for 2026. The only way to get a real number for your bathroom is a measured design and an itemized proposal.
Do I need a permit to remodel a bathroom in Tampa or Sarasota?
Like-for-like cosmetic work, such as swapping a faucet or vanity in the same spot, may not require one. Plumbing, electrical, ventilation, wall changes, and fixture relocation usually do. Requirements vary by city and county, so your contractor should confirm the scope with the local building department and pull the permit under their own license before work begins. Expect permit costs of roughly $500 to $1,500 depending on scope.
Should I move the toilet or shower in my bathroom remodel?
Only if the new layout fixes a real problem, such as a door that hits the vanity, a shower you have to squeeze past the toilet to reach, or a floor plan that wastes half the room. On a slab foundation, moving a drain means cutting concrete and adding inspections, so have your contractor price a keep-the-plumbing version and a move-it version from the same drawing and compare what each one actually gives you.
How do I know my new shower is waterproofed correctly?
Ask which system is being installed and whether it’s complete, with the membrane, seam tape, corners, and drain all from the same system rather than mixed brands. Ask to see the waterproofed shower before tile goes on, and ask whether the pan will be flood tested, plugged and filled for 24 hours, before it’s covered. A contractor who does this every day will have photos and a straight answer.
How long does a bathroom remodel take?
Once materials are on site, a full bathroom remodel takes four to eight weeks of construction for most Tampa Bay homes, from demolition to final walkthrough. A tub-to-shower conversion often finishes in two to three weeks, while a primary bathroom with layout changes can run six to eight. Custom glass, special-order vanities, and permit processing are the usual reasons a schedule stretches, so ask for a written timeline before work starts.
Can I keep the bathroom usable during the remodel?
Not really. Once demolition starts, plan on the room being out of service until final inspection. If it’s your only full bathroom, talk to your contractor about sequencing so the downtime is as short as possible.
What’s the biggest mistake homeowners make?
Skipping the design phase. Almost every other problem on this list traces back to decisions that weren’t made, or weren’t written down, before demolition.